
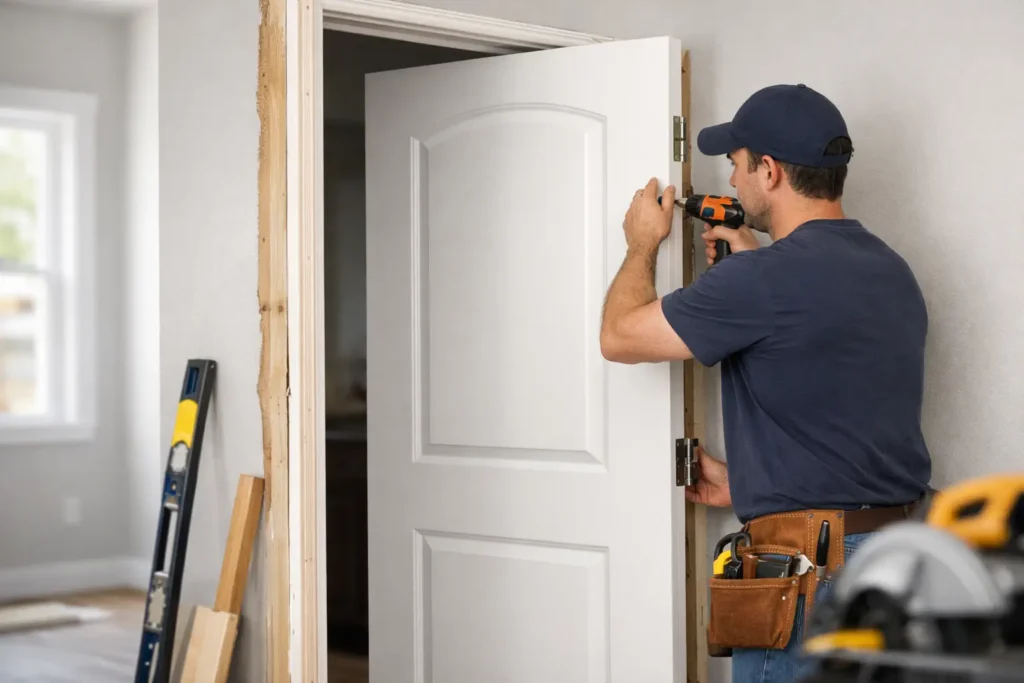
How to Install a Replacement Door Right
A replacement door can make a house feel tighter, quieter, and more secure in a single day – or create years of sticking, drafts, and water problems if the opening is off by even a little. That is why learning how to install a replacement door starts before the first screw goes in. The best results come from careful measuring, proper shimming, and taking the time to make the door work with the opening instead of forcing the opening to work with the door.
Before you install a replacement door
The first decision is not style or color. It is whether you need a slab, a prehung unit, or a repair instead of a full replacement. Homeowners often assume the whole door system has to go, but that depends on the condition of the jamb, threshold, casing, and surrounding framing.
If the frame is square, solid, and free of rot, replacing only the slab may be enough. If the jamb is split, the threshold leaks, or the old door never latched properly, a prehung replacement is usually the smarter choice. It costs more up front, but it eliminates a lot of hidden alignment problems.
Exterior doors raise the stakes. Weather exposure, security hardware, sill pan details, and flashing matter. Interior doors are generally more forgiving, especially in a stable opening with no moisture history. For many Atlanta-area homes, humidity and seasonal movement can expose small installation mistakes fast, so precision matters.
Tools and materials that make the job go smoother
You do not need a truck full of specialty equipment, but you do need the basics in good condition. A level, drill, impact driver, pry bar, utility knife, tape measure, shims, screws, caulk, insulation, and a square will handle most replacement door installs. A reciprocating saw can help when removing stubborn fasteners or cutting the old frame free.
For exterior openings, add flashing tape, backer rod if needed, and a quality sealant rated for the application. Cheap caulk and undersized screws are where many otherwise decent installations start to fail.
How to install a replacement door: start with accurate measuring
If there is one step that deserves extra time, it is measuring. Measure the width in three places, the height in three places, and check the jamb depth. Then check the opening for square by measuring diagonally corner to corner. If those diagonal measurements are off, the opening is out of square.
Also check the floor or sub-sill for level. A door can be perfectly manufactured and still operate poorly if it sits on a sloped or uneven base. This is one of the most common reasons a new replacement door rubs at the head or swings on its own.
When ordering the door, account for enough installation tolerance to shim and adjust. Too tight, and you will fight the unit all the way in. Too loose, and you will spend more time correcting gaps and stabilizing the frame.
Removing the old door without damaging the opening
Take the old door off its hinges first if you are replacing only the slab. For a full prehung unit, remove the interior trim carefully so you can see how the frame is fastened. Cut paint lines and caulk joints with a utility knife before prying. That helps protect adjacent drywall and casing.
Once the trim is off, remove screws or nails securing the jamb. Work slowly, especially if the surrounding wall finish is staying in place. The goal is a clean opening you can inspect, not a larger repair project.
After the old unit is out, inspect the framing. Look for rot, insect damage, water staining, compressed shims, and sagging headers. If the rough opening has structural or moisture issues, fix those before the new door goes in. A replacement door is only as reliable as the opening supporting it.
Prepare the sill and rough opening
Vacuum debris, scrape away old sealant, and make sure the bottom surface is sound. For exterior doors, this is where water management matters most. If the sill area is vulnerable, add a sill pan or flashing detail that directs water back out rather than into the framing.
Dry-fit the new unit before applying sealant. This quick test can reveal whether the jamb depth matches the wall, whether the flooring transition will interfere with the sweep, and whether the brick molding or casing sits correctly. It is much easier to adjust your plan now than after the fasteners are in.
If the sub-sill is not level, use an appropriate shim strategy to correct it. Do not assume the door frame will pull itself into alignment. It will not, and trying to force it usually twists the jamb.
Setting the new door in place
Apply sealant where required by the door type and opening condition, then place the unit into the opening. From here, the hinge side comes first. Get that side plumb before you worry about the latch side.
Shim behind each hinge location and check for straightness with a level. Fasten through the jamb at the hinge points without overtightening. This is where many installers create problems by driving screws too aggressively and bowing the frame.
Once the hinge side is set, close the door and inspect the reveal, which is the gap between the door slab and the frame. The reveal should be consistent along the head and latch side. If it tightens or widens noticeably, continue adjusting the latch-side shims until the door sits evenly.
Fastening for strength and long-term performance
Use screws long enough to anchor securely into framing, especially behind hinges and near the strike. On exterior doors, one of the best upgrades is replacing a short hinge screw with a longer structural screw that bites into the stud. That improves stability and security without changing the appearance of the door.
Check operation after every few fasteners. The door should swing freely, latch without force, and sit evenly against weatherstripping. If you wait until the end to test it, correcting a twisted frame becomes harder.
Insulating and sealing the perimeter
After the unit is aligned and secured, insulate the gap between the jamb and rough opening. Use low-expansion foam designed for windows and doors, or use fiberglass carefully without packing it too tightly. Overfilling the cavity can bow the jamb and change the reveal.
Exterior trim joints and brick molding edges should be caulked where appropriate to block water and air. Keep drainage paths clear. Good sealing is not about trapping everything in place. It is about controlling where air and water can and cannot go.
Common problems when installing a replacement door
A door that swings open or closed by itself usually points to an out-of-plumb frame. A latch that will not catch often means the reveal shifted during fastening or the strike needs adjustment. Rubbing at one top corner can indicate a sagging hinge side or an unlevel sill.
Weather issues tell their own story. Daylight at the corners, uneven compression at the weatherstrip, or water near the threshold usually means the unit was not seated or sealed correctly. These are not cosmetic details. Left alone, they lead to energy loss, hardware wear, and damage around the opening.
There is also the question of old homes versus newer construction. In an older house, walls may be out of square, floors may have settled, and trim details may not match standard replacement dimensions. In that case, a clean-looking installation may require light carpentry, custom shimming, or casing adjustments. That is normal, not a sign the door was made wrong.
When DIY makes sense and when it does not
Some homeowners can handle an interior slab replacement with basic tools and patience. A straightforward prehung interior door in a true opening is also manageable for an experienced DIYer. Exterior doors are different. They involve threshold support, flashing, weatherproofing, hardware alignment, and security considerations that leave less room for error.
If the opening has rot, masonry conditions, nonstandard sizing, sidelights, damaged framing, or signs of previous leaks, professional installation is usually the safer move. The same goes for commercial entries or high-traffic doors where durability matters as much as appearance.
That is where a company with repair, restoration, and replacement experience brings real value. Atlanta Window, Door & Glass works from the condition of the opening, not a one-size-fits-all sales pitch. Sometimes the right answer is a full replacement door. Sometimes it is a targeted repair that saves the frame and restores performance.
Final checks after the replacement door is installed
Open and close the door several times. Lock and unlock it. Check the reveal again, inspect the weatherstripping contact, and look for light around the perimeter if it is an exterior unit. Make sure the threshold feels solid underfoot and the sweep contacts evenly without dragging too hard.
Reinstall trim cleanly, touch up sealant where needed, and keep an eye on the door over the next few weeks. Small adjustments are sometimes part of a proper install, especially as materials settle and compress. A good replacement door should feel solid on day one, but the best installations are the ones that still feel right after a season of use.
If you are deciding how far to go with your project, think beyond the door panel itself. The real job is creating a door system that fits the opening, seals correctly, and holds up to daily use without constant adjustment.