
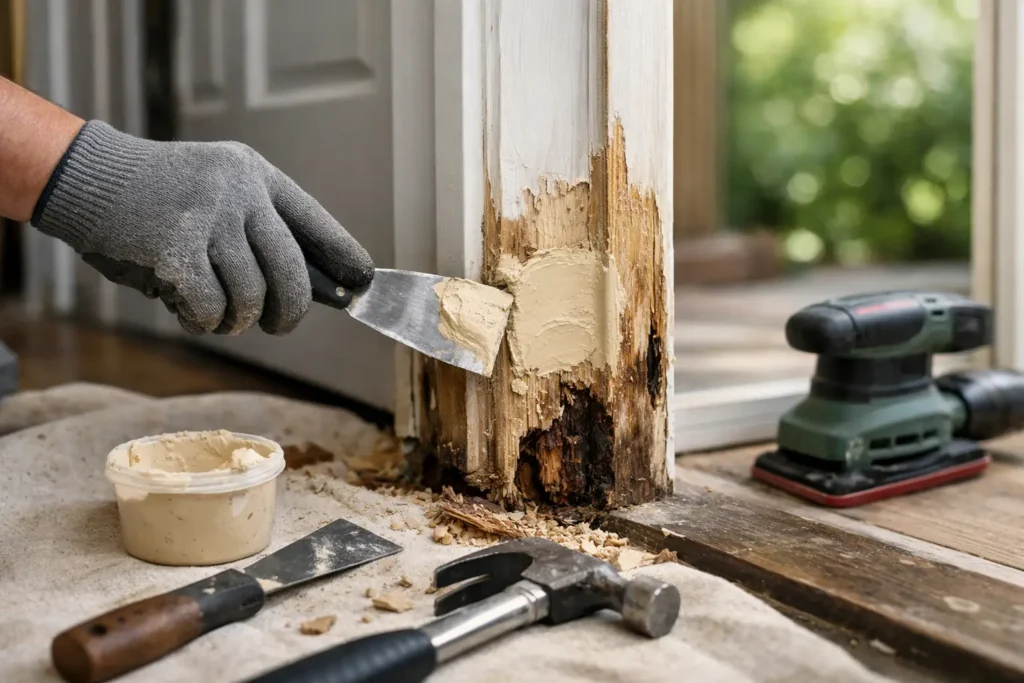
How to Repair a Rotted Door Frame Without Replacing It
A soft spot near the bottom of an exterior door frame is rarely just a cosmetic problem. Water can travel behind trim, into the jamb, and beneath the threshold long before peeling paint makes the damage obvious. Knowing how to repair a rotted door frame starts with finding that water path. Repairing the wood without correcting the cause only gives moisture another chance to do the same damage.
For many Atlanta-area homes, a localized repair can preserve a solid door system, avoid a full replacement, and restore the entry’s appearance. The right approach depends on how far the decay extends, whether the door still operates correctly, and whether the surrounding wall has been affected.
First, determine how much of the door frame is rotted
Door-frame rot commonly begins at the lower corners, where rainwater collects and end grain is exposed. Use a screwdriver or awl to press gently into suspect areas of the exterior trim, brick molding, jamb, sill, and threshold. Healthy wood feels firm. Rotted wood may feel soft, crumble under pressure, or accept the tool far deeper than expected.
Look beyond the visible hole. Remove loose paint and probe the wood several inches above and beside the damaged area. Check the interior side of the jamb as well. If the rot is limited to a small section of exterior casing or brick molding, the repair is usually straightforward. If the jamb is weak around a hinge, strike plate, or deadbolt, the work becomes more involved because those areas help support and secure the door.
Also inspect the door itself. A sagging slab, sticking latch, or widening gap at the top of the door may mean the frame has moved or lost strength. That does not automatically require a new door, but it does mean the repair should address alignment rather than simply cover the damaged wood.
Stop the water before repairing the wood
Rot is a moisture problem first. Before installing any patch material or replacement wood, identify why water reached the frame. Common causes include failed caulk at the brick molding, cracked paint, a missing drip cap, a deteriorated threshold seal, clogged gutters, or sprinklers that repeatedly soak the entry.
On a covered porch, inspect the flashing where the wall and trim meet. On an exposed entry, look at how rain runs off the roof and whether water pools at the sill. A door frame located close to grade can also wick moisture from wet concrete, soil, or mulch. Wood should not sit directly against soil or stay in contact with standing water.
Correcting these conditions may involve resealing trim joints, replacing worn weatherstripping, adjusting the threshold, or improving drainage around the opening. This is the detail that protects the repair and prevents a small carpentry project from becoming a recurring expense.
Choose the repair method that fits the damage
There is no single repair product that works for every rotted door frame. The best method depends on the size of the damaged area and the role that piece of wood plays.
For shallow rot in sound, dry wood, a two-part wood consolidant followed by exterior-grade epoxy filler can be effective. The consolidant strengthens remaining fibers, while the filler restores the surface profile. This option works well for small chips, checks, and limited decay on decorative casing. It is not a good fix for wood that is still wet, severely hollowed out, or structurally important.
When rot affects a larger but localized section of casing, brick molding, or jamb, a wood splice is often the better long-term repair. A carpenter cuts back to solid material, removes the damaged section, and fits a new piece of matching rot-resistant wood or composite trim. The replacement piece should be shaped precisely, glued and mechanically fastened where appropriate, then sealed on every exposed face before installation.
If rot runs through a substantial portion of the jamb, reaches framing behind the trim, or compromises lock and hinge locations, replacement of the jamb or complete door unit may be the safer choice. Trying to preserve severely weakened material can leave the entry difficult to secure, drafty, and prone to continued water intrusion.
How to repair rotted door frame sections with a wood splice
A splice repair begins by removing any exterior trim that blocks access to the damaged section. Work carefully around siding, stucco, brick, and interior finishes. The goal is to expose enough material to see the full extent of the rot without creating unnecessary repairs around the opening.
Next, cut the damaged wood back to a clean, solid edge. Straight cuts are easier to fit, but a longer angled scarf joint can provide more bonding surface on certain trim profiles. Remove all softened fibers. Leaving even a small pocket of decay behind a patch can allow the repair to fail from the inside out.
Measure and mill the replacement piece to match the original profile. On older homes, off-the-shelf trim may not match exactly, which is where custom carpentry makes a visible difference. Dry-fit the piece before applying adhesive. It should sit flush without forcing the surrounding frame out of alignment.
Use an exterior-rated construction adhesive suitable for the material, along with corrosion-resistant fasteners placed where they will not split the wood. Fill small joints with a paintable exterior sealant, not interior caulk. Once the repair is stable, prime all bare wood, especially cut ends and the back side of replacement trim. Finish with high-quality exterior paint to create a continuous protective surface.
If the repair involves the door jamb, check the door operation before final finishing. The reveal around the door should be reasonably even, the latch should engage without lifting or pushing the slab, and the weatherstripping should make consistent contact. Minor adjustments to hinges, the strike plate, or the threshold may be needed after the frame is rebuilt.
Do not use filler as a shortcut for major rot
Wood filler has a place in finishing work, but it should not become the structure of a door frame. A large patch may look acceptable immediately after painting, yet it cannot reliably hold hinge screws, support a strike plate, or protect an opening where water continues to enter.
Expanding foam is another common mistake. It can fill a void, but it does not replace sound framing or provide a durable exterior surface. It also makes future repairs more difficult when used behind trim without addressing the actual water entry point.
A quality repair is built on sound material. The visible finish comes last.
When a full door-frame replacement makes more sense
Repair-first service is often the most budget-conscious choice, but replacement is sometimes the responsible recommendation. Consider a full frame or door-unit replacement if the rot extends into wall framing, the threshold is failing, the door has persistent alignment problems, or multiple sides of the opening are deteriorated.
Replacement can also make sense when an older door is inefficient, damaged, or no longer provides reliable security. Installing a new unit may allow the contractor to rebuild the opening, update flashing, improve insulation around the frame, and establish a proper weather seal in one project. The trade-off is more cost and more disruption than a localized repair, particularly if exterior finishes need to be removed and restored.
For commercial entries, security and code considerations can make this decision more urgent. A compromised jamb around panic hardware, closers, hinges, or access-control components should be evaluated by a qualified door professional rather than patched as a cosmetic repair.
Protect the repaired frame for the long term
After the work is complete, inspect the door frame at least twice each year and after severe storms. Keep paint intact, renew failing sealant joints, and clear debris from the threshold area. Watch for peeling finish at the bottom corners, dark staining, soft caulk, or new gaps between trim and siding.
Atlanta Window, Door & Glass can assess whether a damaged entry needs targeted restoration, custom carpentry, or a full replacement. A careful inspection helps preserve what is still sound while making sure the finished repair is dry, secure, and built to last.
A door frame should do more than look clean after a repair. When the wood is solid, the water path is corrected, and the door closes properly, the entry is ready to protect the home again.